Life is uncertain, eat dessert first…

More cupcakes than you can shake a stick at…

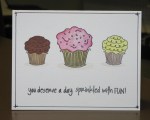
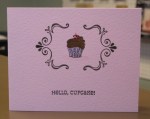
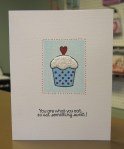
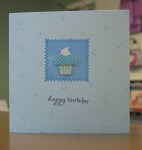
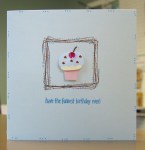
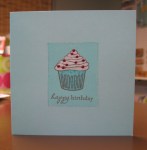
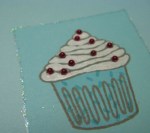
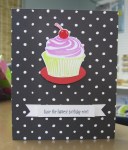
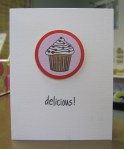
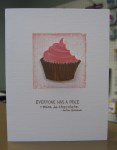
63 cupcake cards down, 36 to go! I managed to stamp, colour and cut out a bunch of cupcake images last night but haven’t stuck them to cardstock yet. A lot of the cards look very similar because I didn’t want to overwhelm myself with too many designs, but my favourite so far is definitely the black and white polka dot background – I borrowed my friend Jackie’s Basic Grey cupcake stamps because I fell in love with a card that Julie posted on her blog. After using those stamps, I decided I had to order my own set…. because contrary to my logic back when The Paperie had them in stock, a person can NOT have too many cupcake stamps. 🙂

Due to popular demand, I have decided to teach a Cupcake Card class in March at The Paperie, so stay tuned to my Blog for more details!

And don’t forget – I will be participating in “Get Baked! Art for your Sweet Tooth” – an Art Exhibit dedicated to Cupcakes during the first weekend in February. Come by the Arts and Culture Center and see a slew of art in a variety of mediums, all inspired by the Cupcake. Art will be for sale and partial proceeds go to Marguerite’s Place. I will be there selling all the cupcake cards you’ve seen on my Blog recently, and more! If you see a design that you HAVE to have, you are welcome to pre-order any number of cards by commenting here on my Blog (cards are 3 for $10.00 and must be picked up at the exhibit).  

VSN – Challenge 4

Well it’s 12:54am now and I’m exhausted – the last challenge from Glenda was to use only Red, White, and Black on a card.

Click to enlarge


My red VersaColor ink is dying, so it appears kind of pink on this card – I embossed it because I totally smudged my first attempt when using red chalk ink. Both the red and white papers are Shimmer Couture, which work best with VersaMagic ink, StazOn, or if you’re in a hurry you can grab some clear powder and emboss any colour of VersaColor pigment ink. Forgive the crooked stamping – I was in a hurry and I never use a stamp positioner. I figure if it doesn’t look homemade, what’s the point in making it! 🙂

VSN – Challenge 3

Geeta’s challenge was to create a card with just one layer – no paper layers, so here’s my third (and most favourite) card of the evening…

Click to enlarge

Don’t you love my charming keyboard background? My Ott-Lite is right above my computer so it’s the best spot for lighting at 12:30 in the morning. Thanks to Krystie, the Big BL stamp has become one of my absolute favourites. This is my go-to stamp for creating one-layer cards whenever I’m not using two-toned notecards. It was hidden among my Christmas stamps so I haven’t used it at all since December, but now that it’s within reach I’ll definitely be using it to make a TON more cupcake cards.

I outlined the block with my Quickie Glue pen and then added glitter for a little bling. The frosting on the cupcake was coloured with my white Uni-ball pen but then I caught a glance of my new Moonlight Smooch Ink so I applied a nice frosty layer over the pen. A few cranberry pearls made sweet little candies – I would DIE for these in SILVER – I used to love those round silver candy sprinkles when I was a kid.

VSN – Challenge 2

The theme of the second challenge over in the A Muse Lounge is to “Create a card for your best friend! “

My best friend is on the other side of the country and we don’t get a chance to chat as much as I would like. She’s a classy girl and her favourite colour is blue, so I attempted to make a card that reflected her style but also our shared sense of humour…

Click to enlarge


Off to start my next card – undoubtedly there will be cupcakes involved! 🙂

VSN – Challenge 1

I’m participating in my first Virtual Stamp Night over on the A Muse Lounge – it’s a Pajama Party. Every half hour there is a new challenge posted… the first challenge is “Create a card based on your celebrity crush! Make sure to tell us who it is and even include a picture if you want to! Don’t have a current crush? Use one from the past!! Get creative!”
 

Okay, so the funny thing is that I don’t actually have a “celebrity crush”, per se. However, I am a music junkie and I have a special weakness for punk musicians, which is why the A Muse Rockstar stamp is one of my all-time favourites.

Click to enlarge


Can you believe I don’t own the “You Rock” stamp?! I was shocked, but I improvised. I used my Black Gelly Roll Glaze pen to give the Rockstar some leather pants. I’ve got four more cards up my sleeves, as the challenges are revealed over on the lounge – so keep checking back over the next two hours!

Take Five!

Cupcake, Take 5!

Click to enlarge

For my fifth and final cupcake this week someone gave me a brilliant idea to make cupcakes with faces which made me step back and look at all of my cupcake stamps in a new light. For the cupcake top I inked around the edge of the stamp omitting the line in the center of the frosting so I could draw the face in the blank space after I stamped the image. Now, if I could draw I probably wouldn’ t be stamping so please forgive my modest smiley face. The top is coloured with Copic markers and the bottom is coloured with Gelly Roll Glaze and Metallic pens.

I used another “frosting” top from the Cupcake Builder set to make the little “thought bubble” and the sentiment is also from that set. I actually cut the sentiment apart so I could stagger it – my acrylic block has a grid on it, so whenever I need to line up my stamp all on the same line it’s easy peasy – I cut apart 90% of the clear stamp sentiments I own whether they are staggered or all on one line – I find this adds a lot of versatility to the stamps.

Hope you all enjoy your weekend! Don’t forget to check out the Get Baked Art Exhibit on February 5th-7th at the Arts & Culture Center if you’re in the St. John’s area.

Take 4

Cupcake, Take 4

Click to enlarge


I stamped the bottom half of this cupcake on Doodlebug flocked brown paper so it would have a fuzzy, spongy feel. This is a cute technique for teddy bears and other critters – the white flocked paper can be coloured, which is good fun. The top portion of my cupcake was stamped on white paper and then I applied Liquid Applique which I allowed to dry before heat setting it. I thought it would be cool to try and colour the liquid applique before I heat it up, but that plan did NOT work out with the colour I chose… so I covered up the ugliness with some Cinnamon stickles and voila… another sparkly chocolate cupcake.

Check back tomorrow evening for my last cupcake card featuring this particular cupcake. I know I cheated by switching out the bottom of the cupcake, but at least I kept the same frosting for each one.

Speaking of cupcakes, if you haven’t been to Bistro Sophia yet, head downtown immediately and ogle their desserts. I hear their cupcakes are to die for. Yesterday I sampled their Opera Cake – chocolate and peanut butter, a little slice of heaven for just $4.75. They have extremely reasonable prices considering everything is made fresh daily on site with premium ingredients. They are located on Water Street in St. John’s in the old Coffee Matters location (near Celctic Hearth).

Take 3

Cupcake, take three!
 

Click to enlarge

For this card I went pretty simple once again, as I have to make a LOT of these. I switched out the bottom of the cupcake since you can mix and match all the cupcakes tops and bottoms in the Cupcake Builder set. The top of the cupcake was coloured in with Zig Glue and I added Doodlebug glitter to make my cupcake sparkle. I totally forgot to stamp an oval beneath the cupcake as a shadow, I’ll have to do that later tonight. I love this particular sentiment from A Muse because it’s great for so many occasions – halloween, birthdays, valentine’s, easter, etc.

I wish I could get the 4.5″ square envelopes because I think this card would’ve been cute as a square but alas, those envelopes are impossible to find. If you know where I can get some, please let me know!

#2 of 5

Here is my next Cupcake card that follows a similar format to yesterdays card, but it has a portrait orientation instead of landscape.

Click to enlarge

I wish I had the time to use Liquid Applique on all 99 cards I’m making because I absolutely LOVE the result. I sprinkled ultra fine prisma glitter over the liquid applique on this cupcake before heating it up. I’m not one of those people who has the patience to let Liquid Applique dry before heating it and I actually prefer the bubbly, fluffy effect you achieve from heating it while it’s still wet. If you were to allow it to dry first it would be slightly smoother when heated.

I’ll be back on Thursday to post my next two cards as I won’t have internet access tomorrow and will spend the day “baking up” some cupcake cards. See you then!

Five Ways in Five Days

Geeta posed a challenge to everyone on the A Muse Lounge to use the same stamp on five different cards. Since I have to make 99 Cupcake cards for an upcoming Art Exhibit I decided I would use one of the images from the A Muse Cupcake Builder clear stamp set. Here is my first card…

Click to enlarge


I used Copics to colour this cupcake – I was aiming for a chocolate cupcake with lemon cream icing. This first card is pretty dull but I’ve been having fun using a ton of different A Muse sentiments with this cupcake so stay tuned throughout the rest of the week for more cupcakey goodness.

If you’re in St. John’s you should check out the exhibit – Get Baked: Art for Your Sweet Tooth. The show is going on from February 5th to 7th at the Arts & Culture Center. Click on the link for more details!

Upcoming Classes

A Muse Stationery Set – Monday, January 25th (6:30pm)
Join me at The Paperie to create a beautiful Stationery Set of 6 matching cards and envelopes featuring the new A Muse Shimmer Couture Paper and stationery stamps. Keep it for yourself or give as a gift – these cards are perfect for any occasion and will be enclosed in a matching portfolio. Included in the cost of this class is one of the newest clear stamp sets from A Muse, the Monogram Frames Set! You will love the versatility of this stamp set and you’ll be able to use it again and again to create gifts and custom stationery any time of the year.

Check out the beautiful Christmas Card that Beth made using this stamp set:

http://astampingoodtime.blogspot.com/2009/11/fast-fabulous-holiday-cards.html

And here are more great cards that Julie designed with this set:

http://amusenews.typepad.com/a_muse_news/2009/12/monogram-frames-galore.html

——————————————————————————————————

February Class:

Something’s Fishy Valentines – Tuesday, February 2nd (6:30pm)
Join me at The Paperie for my third class as an official A Muse Instructor – we will create a bundle of coordinating Valentines that are sure to make a splash! Featuring the latest A Muse Release: Sea of Love, we will be diving into fun techniques – experimenting with Copics, Spicas, and using A Muse Simple Stick powder to make those valentine’s glitter and shine! Even if you don’t typically make valentine’s cards, you won’t want to miss out – we’ll have a variety of birthday and other sentiments on hand that you can use in place of  “Happy Valentine’s Day” greeting if that’s what floats your boat!

A New Decade…

Happy New Year Everyone!

I haven’t dropped off the face of the earth, unless you count the world wide web. In keeping with the theme of 2009, technology has failed me once again. My laptop died shortly before Christmas and I have been without a home computer – I might just have to bite the bullet and save up for a new computer.  

Have you seen all of the amazing new stamps from the new A Muse Sea of Love release? Oh my! I live on an island in the Atlantic ocean, so this oceanic release is right up my alley. I don’t think I’ve ever seen a more versatile Valentine’s release – can’t wait to get my hands on these stamps, especially the Seahorse and the Jellyfish!

The Muses really outdid themselves with their fantastic cards and projects this week – each blog is worth a gander, so click on the links below “A Muse Creative Team” for lots of inspiration.