Inspired by HRR

I have been inspired by Julie Ebersole for a couple of years now. I won’t lie, meeting Julie in Seattle in October was the highlight of my entire trip and I have the fan-girl picture to prove it… 

Click to enlarge

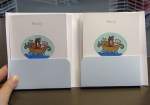
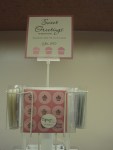
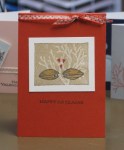
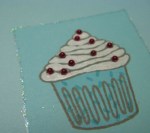
 The Monthly A Muse Challenge over in the A Muse Lounge is to create a card inspired by Julie Ebersole. Sounds pretty easy, but it was actually hard for me to choose my inspiration for the card I’m about to show you. I could’ve easily drawn inspiration from any and every card that Julie has made but I thought it fitting to use a stamp that Julie herself designed. I chose THIS card (click) as my inspiration because I loved the colours, here’s what I came up with… 

Click to enlarge

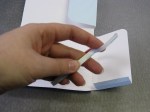
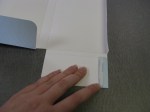
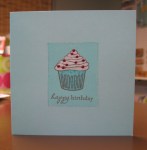
I didn’t have room to fit the whole greeting, so I omitted the word “sincere” and just stamped “thanks” on the card, accenting the word with a few gemstones I coloured with a Copic marker. This is actually the solid Chrysanthemum stamp but I used a ultra fine tip black pen to draw the outline. I broke out my old favourite tool for this card – my paper Crimper! I love that thing and I don’t know if I’ll ever tire of it – do you think it’ll ever make a comeback? Let’s have a Crimper revival – but no hair crimping please. 🙂

Resist Poppies

Must resist Poppy stamp.

Must resist Poppy stamp.

This is the mantra I am repeating to myself, because the store owns the Poppy Background by Hero Arts and I really don’t need to own it. But if I did own it, I could use it at home any time I wanted… but I still don’t need to own it. How much longer can I resist this stamp when the effect is SO beautiful…

Click to enlarge

I stamped the Dots & Flowers Background on ivory cardstock with Antique Linen Distress Ink and allowed to dry, then stamped the Poppy Background on top with VersaMark and embossed with clear embossing powder so the background would show through. Then I just went in and added colour to the poppies using more Distress Inks with my Fantastix applicators – ironically this is a Resist Technique… and I think resistance is futile.

Scrapbooking

I scrapbooked for myself… for the first time in maybe two years. I have made layouts for the store, calendars for family, but not once have I made a layout for myself since 2008. I started an album when I was 27 called “27 things that make me happy at 27″… it was a very happy period in my life. Then the bottom fell out and suddenly I was not happy anymore… then my dad got really sick and I haven’t really scrapbooked since, except for the odd Class I was teaching. 

I participated in an online crop last night and made THREE layouts and two cards! One of the challenges was:  “Create a LO about a struggle that you have survived…how did that challenge/situation help shape you into the woman you are today?” Now I’m going to spare you the sentimental journaling, but here is the 8×8 layout I created…

Click to enlarge


I typically only use one picture so I feel more comfortable working with 8×8 – I always put too much pressure on myself to fill up the negative space on a 12×12 layout. Lazy me, I didn’t use spellcheck before writing “independence” right on there, which is funny considering I am sort of anal about spelling and grammar.

Here’s one of the cards I made using ONLY items on my desktop – luckily I keep that pretty cluttered 😉 The challenge was to create a card or layout using only items that were within arms reach.

Click to enlarge

I used my corner rounder to create the scalloped border and paper pieced the little dresses with scraps of A Muse gingham paper.

Interactive Cards

I’ve updated my Class schedule for March and am finalizing the details for my April card class – the theme in April is going to be babies, since spring is all about new beginnings and joy.

This week’s challenge over on The Paperie Blog is to create an interactive Scrapbook layout or card, so I posted one of the cards we made in my recent Cupcake Card Making Class at The Paperie this past Monday.

I have a few followers here who don’t check out my store’s blog so I thought I would post the card here as well – if you follow both blogs, you are likely to see some overlap since I’m the one updating both 🙂

Click to enlarge

A Muse Stamps: Cupcake, Cupcake Builder set (sentiment). A Muse Papers: Pink Shimmer Couture, Kitchen Black Notecard, Ocean Blue Solid cardstock.

I love shaker cards – even better when you can use REAL sprinkles in them.

AccuCut Tutorial

This week I’m going to be a Guest Blogger over on Mushy Peas, a blog created by Tara – a good friend of our mutually good friend, Ally. I’ve met Tara a few times at various new-baby related events at Ally’s house and recently we both participated in the Get Baked Exhibit. I didn’t want to clutter up her Blog with too many pictures, so I’m posting the AccuCut tutorial here on my own Blog. The AccuCut is a fantastic die-cutting machine we have at work that cuts out a ton of great shapes, invitation enclosures, favour boxes, Alphabet sets and more – to see a slew of AccuCut projects related to Scrapbooking check out The Paperie’s Blog – I might’ve even made a few of them 😉

Click on each picture below to see a larger version with instructions…

If you are interested in trying out the AccuCut System, stop by The Paperie for a demonstration – all it will cost is a sheet of paper!

Thanks to Tara for inviting me to be a Guest Blogger on Mushy Peas. I’ve been a busy bee and wasn’t really feeling particularly creative after expending so much creative energy on the Cupcake exhibit. Then this week hit and I really wasn’t sure I had it in me, but creating the project last night helped to take my mind off of things. I’ll let you know when the post goes live over on http://mushypeas1.blogspot.com 🙂

monday mourning…

it’s a sad day today.

ollie, my kitty of 16 years took a sudden turn for the worse yesterday.

i took him to the vet this morning to confirm what i already knew in my heart. i could tell he was giving up. the vet said he was going downhill fast. i knew he was not going to get better this time and i had to make the hardest decision i’ve ever faced. i had to let him go.

i did all i could for ollie. taking him to the vet in january bought him 40 extra days, and it was worth every penny. knowing what i know now, i wouldn’t have done it any differently. i would’ve spent that $400 regardless. he had a good life.

me with my little sook in 2004

i’ll never forget walking in the door on christmas eve when i was thirteen years old – mom said “there’s a surprise for you in the dining room.” i came up the stairs and saw this precious little kitten face peeking out from behind the leg on the table. the next morning he fell from the top flight of stairs in our house while we were opening presents and had a bloody nose and real tears. i scooped him up and promised to never, ever let him go.

i’ll never forget his little kitty nose… pink and brown, like a half-cooked porkchop. the notches missing in his ears from his wussy days as an outdoor cat. the bend at the end of his tail. the way his chin cocked up whenever i went to stroke it. he loved to cuddle. he had the best purr. the best temperament. so sweet and docile. so loving.

ollie slept with me every night when i lived with my parents until i moved out in 2004. as much as i wanted to bring him with me, i knew he would be happier roaming his old stomping grounds, hunting shrews and birds in the backyard. when my parents divorced in 2006 and sold our old house, ollie moved in with me.  every night when i went to bed i would call out to him, and no matter where he was in the house he’d come to me for snuggles before bed. he’s been the one constant in my life since i was 13. friends have come and gone, relationships have changed… but my little bunny was always there. i’m going to miss his little face.

ollie2

Cutest little nose.

A quick update…

I finally got around to making a Blog header. I knew I wanted to use the A Muse Octopus somehow… but inspiration hadn’t really struck until tonight when I was looking at Heather’s Blog header. The little birdie perched on her title sang to me – a little bird told me… “go for it”.  So I did.

45 minutes later, I mucked up the “graphic” you see above using MS Paint.

I haven’t had a chance to make a single card since Sunday, but here’s a glimpse at the Cupcake show…

I have four more Cupcake cards to whip up for my upcoming card class at The Paperie so I’m really hoping for that snow day tomorrow. After March 1st I don’t want to see another cupcake for at least… a week. 🙂

Cupcake Bonanza

It’s been a week since I posted any cards, so here are two more Cupcake card designs for this weekends Get Baked art exhibit at the Arts & Culture Center…

Click to enlarge

Stamps: A Muse “You are what you eat” and Inkadinkadoo Clear Cupcake set

This A Muse sentiment works perfectly with cupcakes – good for thank yous, birthday, valentines, etc. I stamped the bottom of the cupcake on patterned paper and the top is stamped on Dotted Swiss Bazzill cardstock, then I ran the top part through my Xyron sticker-maker so that the adhesive would be on the front of the image to easily adhere glitter. Some pop dots on the back and presto! A quick little card in three easy steps.

Here’s one more little cupcake with a face…

Click to enlarge

 Stamps: A Muse Cupcake Builder set; Copic Markers; A Muse & BoBunny Papers.

Have you seen all the adorable Bunny cards popping up on all of the A Muse Creative Team Blogs this week? I’m embarrassed to admit that I don’t own any Bunny stamps – can you believe it? After seeing all of the inspiring ideas today on the blogs of my fellow Muses, I practically skipped through the aisles of the A Muse online shop today filling my little basket full of goodies.

How cute is that Bunny in the carrot car? Why didn’t I notice him last year? Why don’t I own him? Just look at the adorable cards that Cheiron and Elena made with that bunny! I love that they both stamped him on an incline – and neither designer saw the others card before posting. Great minds!

Hope to see you all this weekend at the Get Baked art exhibit, have a wonderful Valentine’s Day!

Cupcake Art Exhibit

The Get Baked art exhibit is almost here – finally! Stop by the Arts & Culture Center in St. John’s this weekend to check out myriad Cupcake art – there will be paintings, embroidery, photographs, collages and more! I’ll be selling handstamped Cupcake cards throughout the weekend, so come get your fix of sweets!

There will be a Cupcake buffet at the opening reception on Friday, February 12th from 7-9:30pm. The show runs Saturday from 12-7pm and Sunday from 12-5pm. Hope to see you there!

Get Baked: Art for your Sweet Tooth!


Valentines

I took a break from making Cupcake cards to teach my third class as an official A Muse Instructor on Monday night. Truth be told, I’ve been teaching A Muse classes at The Paperie since 2007 – but NOW you can sign up for at least one A Muse Class a month!

Check out the Valentine’s we made in Monday’s class…

I am loving the versatility of these stamps – you can use them all year long for any occasion! And you’ll notice that my all-time favourite stamp (the Big Bl) makes an appearance in two of the cards. I am always so inspired by the cards Krystie makes using the Big Bl. Here are a few other amazing cards Krystie has made using this fantastic stamp:

Masking:

http://www.cupcakemartini.com/2009/10/more-amuse-bouche.html

Multi-coloured Big Bl background:

http://www.amuselounge.com/gallery/showimage.php?i=2407&c=18

Gotta love it!

Life is uncertain, eat dessert first…

More cupcakes than you can shake a stick at…

63 cupcake cards down, 36 to go! I managed to stamp, colour and cut out a bunch of cupcake images last night but haven’t stuck them to cardstock yet. A lot of the cards look very similar because I didn’t want to overwhelm myself with too many designs, but my favourite so far is definitely the black and white polka dot background – I borrowed my friend Jackie’s Basic Grey cupcake stamps because I fell in love with a card that Julie posted on her blog. After using those stamps, I decided I had to order my own set…. because contrary to my logic back when The Paperie had them in stock, a person can NOT have too many cupcake stamps. 🙂

Due to popular demand, I have decided to teach a Cupcake Card class in March at The Paperie, so stay tuned to my Blog for more details!

And don’t forget – I will be participating in “Get Baked! Art for your Sweet Tooth” – an Art Exhibit dedicated to Cupcakes during the first weekend in February. Come by the Arts and Culture Center and see a slew of art in a variety of mediums, all inspired by the Cupcake. Art will be for sale and partial proceeds go to Marguerite’s Place. I will be there selling all the cupcake cards you’ve seen on my Blog recently, and more! If you see a design that you HAVE to have, you are welcome to pre-order any number of cards by commenting here on my Blog (cards are 3 for $10.00 and must be picked up at the exhibit).  

VSN – Challenge 4

Well it’s 12:54am now and I’m exhausted – the last challenge from Glenda was to use only Red, White, and Black on a card.

Click to enlarge


My red VersaColor ink is dying, so it appears kind of pink on this card – I embossed it because I totally smudged my first attempt when using red chalk ink. Both the red and white papers are Shimmer Couture, which work best with VersaMagic ink, StazOn, or if you’re in a hurry you can grab some clear powder and emboss any colour of VersaColor pigment ink. Forgive the crooked stamping – I was in a hurry and I never use a stamp positioner. I figure if it doesn’t look homemade, what’s the point in making it! 🙂

VSN – Challenge 3

Geeta’s challenge was to create a card with just one layer – no paper layers, so here’s my third (and most favourite) card of the evening…

Click to enlarge

Don’t you love my charming keyboard background? My Ott-Lite is right above my computer so it’s the best spot for lighting at 12:30 in the morning. Thanks to Krystie, the Big BL stamp has become one of my absolute favourites. This is my go-to stamp for creating one-layer cards whenever I’m not using two-toned notecards. It was hidden among my Christmas stamps so I haven’t used it at all since December, but now that it’s within reach I’ll definitely be using it to make a TON more cupcake cards.

I outlined the block with my Quickie Glue pen and then added glitter for a little bling. The frosting on the cupcake was coloured with my white Uni-ball pen but then I caught a glance of my new Moonlight Smooch Ink so I applied a nice frosty layer over the pen. A few cranberry pearls made sweet little candies – I would DIE for these in SILVER – I used to love those round silver candy sprinkles when I was a kid.

VSN – Challenge 2

The theme of the second challenge over in the A Muse Lounge is to “Create a card for your best friend! “

My best friend is on the other side of the country and we don’t get a chance to chat as much as I would like. She’s a classy girl and her favourite colour is blue, so I attempted to make a card that reflected her style but also our shared sense of humour…

Click to enlarge


Off to start my next card – undoubtedly there will be cupcakes involved! 🙂

VSN – Challenge 1

I’m participating in my first Virtual Stamp Night over on the A Muse Lounge – it’s a Pajama Party. Every half hour there is a new challenge posted… the first challenge is “Create a card based on your celebrity crush! Make sure to tell us who it is and even include a picture if you want to! Don’t have a current crush? Use one from the past!! Get creative!”
 

Okay, so the funny thing is that I don’t actually have a “celebrity crush”, per se. However, I am a music junkie and I have a special weakness for punk musicians, which is why the A Muse Rockstar stamp is one of my all-time favourites.

Click to enlarge


Can you believe I don’t own the “You Rock” stamp?! I was shocked, but I improvised. I used my Black Gelly Roll Glaze pen to give the Rockstar some leather pants. I’ve got four more cards up my sleeves, as the challenges are revealed over on the lounge – so keep checking back over the next two hours!